Showing posts with label sewing. Show all posts

Thursday, January 26, 2012

Desperate Housewife's Quiltalong: Round the Twist


I'm so excited that my first ever block tutorial is for the very fun Desperate Housewife's Quiltalong, hosted by the lovely Jane. If you haven't seen the amazing range of blocks on offer, one a week from Jane, and one a week by guest bloggers, then pop on over once you've had a look at my tutorial!

This little block of mine is called "Round the Twist", because I'm sure any desperate housewife worth her salt has been driven round the twist once or twice. I know I have.

I based this block on the flying geese unit, which I'm currently obsessed with. And we're going to make it using the magic method, which I'm currently obsessed with. If you love to chain piece then you're going to love this. And if you've been scared of making flying geese, be scared no longer! This really is magic. And you will save yourself some fabric, too! That's got to be a good thing, yes? My flying geese obsession has led me to this Ruby quilt. And of course the Swoon quilt.

(note: there are numerous tutorials around the web teaching this method. This one at Connecting Threads gives measurements for flying geese in whatever size you like - handy!)

So, choose some fabrics from your stash. You'll need two contrasting colours for the twist, and a light or neutral for the background. My print fabrics are from the Loulouthi collection by Anna Maria Horner, which I'm, well, maybe just a little bit obsessed with. The neutral is actually also a print - a text print from the Make Life collection by Sweetwater. I'm currently experimenting with using less solids and more prints in their place, and also text fabrics. I need some more. Anyway. Back to the block.

You'll need the following pieces for your block:
One square of print fabric a - 5 3/4 inch.
Two squares of print fabric b - 3 1/8 inch.
Two squares of neutral fabric - 3 1/8 inch.
Four rectangles of neutral fabric - 4.5 by 2.5 inch.

(And apologies for the big shadow in some of these photos. Sewing at night is a necessity in this household and doesn't make for good camera work!)


Layout your big square and then the two neutral squares in opposite corners. They will overlap slightly in the middle to form a little square. Make sure this overlapping part is really square, and not a rectangle. Now draw a line from corner to corner.


Now stitch a line 1/4 inch both sides of the drawn line. Here's where the chain piecing part comes in handy. If you are making a lot of flying geese blocks, you can simply prepare the above units, stack them up and whiz away. They'll be done in no time. At the very least I like to make two blocks at a time, because it's more time efficient and you're not cutting the thread at the end of each and every seam.

Another important tip when sewing is to use a *scant* 1/4 inch seam. This means just a thread or two shy of a full 1/4 inch. Trust me - if you haven't tried it, you must - it makes for much more accurate piecing. Get out your ruler and measure your seams and you will see what I mean. If your foot is travelling outside the line, your seam is actually a bit bigger than 1/4 inch, and over multiple blocks or several pieces to a block, that adds up to a lot. But I digress!

Once you've sewn down both sides of the line, cut the piece in half, right on the drawn line. Then flip the little triangles over and press (I find it easier to press towards the small triangles).

Now take your other small squares and place them in the remaining corners of the two (now separated) units, again, it should overlap the two flappy triangles with a tiny square in the middle. Feel free to wiggle it into place to make sure it's lined up properly. Then sew either side of the line as before and cut the unit into two pieces. Flip those triangles over and press, repeat with the other unit and ta-da! You have made FOUR flying geese in just a few simple steps.

But we are not quite finished! The goose unit needs a little trimming to whip it into perfect shape. We are aiming for a unit of 4.5 by 2.5 inch. Have a look at your unit and you will see it needs a little haircut. Start with a short side as in the photo below. Line up the opposite side on a line on your cutting mat, place your ruler 1/4 inch back from the nearest line and trim - you might find that you don't actually trim a full 1/4 inch off the block, but we are just paring back each side as needed to get to the 4.5 by 2.5 inches required. Rotate the block to cut the long side with the point of the goose and cut again - there should be a seam allowance of 1/4 inch from the point to the edge! Repeat for the two remaining sides and you'll have a lovely 4.5 by 2.5 inch flying goose.

Now lay out your geese with the neutral rectangles as shown, and sew each rectangle-goose pair together, and press (the direction is not so important here, so whatever feels right).


Now you're ready to sew the pieced units together. If you want your geese to have nice sharp points, then have a look at the units next to each other - see how the points are a nice 1/4 inch from the edge? We want our seam to go right through those points. If it doesn't, you'll end up with poor cut-off goose wings. Eek!

If for some reason you've ended up with a smaller seam allowance poking out above those points, don't worry, you just need to make sure your needle goes through the intersection point. If you do this, you'll still end up with pointy wings, albeit with slightly smaller seam allowances. But no-one's going to know!


Easiest way to do this is put a pin right through the intersections on both pieces.


Before you press the paired up units, check which way you want them to lie. I like my seam allowances to nest, so I press one unit with the seams going to the left, and the other going to the right, then they nest nicely. Again, before sewing together, check your goose points to make sure your seam goes straight through that intersection!


And there you have it, one Round the Twist block! I hope you've enjoyed this one and hopefully learnt some tips about making flying geese. If you give it a go I'd love to see a pic. And now do go and have a look at Jane's blog for some super-clever blocks.

Monday, March 14, 2011

Put a bird on it!


My arm is gradually feeling better and I've seized the moment to catch up on some machine time. Here's what I've been doing this weekend.

1. Working on my doll quilt. I'm still at the quilting stage. As I may have mentioned once or twice before, although I do love my swirly quilting, it takes an inordinate amount of time. Anyway, we are getting there! I estimate it is about 75 per cent done. This will be hard to part with! I hope my partner likes it as much as I do!
2. Working on some bee blocks for the 3x6 sampler bee. This is where you're grouped with 6 other crazy girls, you choose a block style and then make it in their choice of colours. So six colour ways of the same block. You theoretically have three months to complete your blocks and send them off (and in turn receive six different style blocks in your own choice of colours). This time round I've chosen a wonky star block. (I say theoretically, because it seems some people take the three month thing as a lower limit.... This may or may not include me.)

This is block #3 (the other two I made some time ago, before my arm went kaputt). Very happy with this one!

And this is block #4.... Hmmmm. I'm not sure about this one, as you can see I kind of over-exaggerated the wonk on one of the star points! Not really on purpose, but just not really thinking about what the result would be. On the one hand, I really like it. On the other hand, I don't know if the intended recipient will like this level of wonkiness. It's not for everybody.

Anyway, I would really love to know what you think!

**Please leave a comment and let me know if you like the extra-wonkity star block, or if I should pick it undone and try again!!**

3. Finally - OK this one doesn't involve the machine, but I have to report on it, because I've reached the milestone of having all the leaves in situ. Did you notice how I dropped in a little Latin there? Granted, the leaves are not all sewn down, but nearly all of them are - well, there are 32 leaves left to sew. At the current rate of sewing these should all be knocked over by next weekend.

If you look closely you might also notice that my tree has grown a flock of birds. Who are at the moment still wingless. Not to mentioned legless. I had to put these in at this stage to facilitate accurate placing in situ of the final set of leaves. In contrast to the leaves, the birds are not hand sewn, but raw-edge machine appliqued (along with the trunk and branches). This stage happens after all the leaves are done. So - soon!! And then more swirly quilting!! Hooray! I might even run a little competition to estimate how many hours the quilting will take.


And, finally finally, just had to share with you this video I found about how things are so much better when you put a bird on them. I couldn't agree more!!

Tuesday, August 17, 2010

Moving on...

I loved quilting this project. Never mind the fact that I started quilting it only to discover about twelve beautiful swirls later that the backing fabric was folded over and I'd quilted through both layers.... eeeerrrrggghhh. My time is so precious I hate to waste it unpicking! But never mind, it could have been worse!

And yes, it did take a lot more than 10 minutes. Maybe an hour all up. Not counting the unpicking. Ahem.

Anyway, so proud of this one and so pleased with how the swirls are going - getting better and better. Practice definitely does make perfect. I am nearly ready to show you the completed 'Willow' too - very happy with that too!

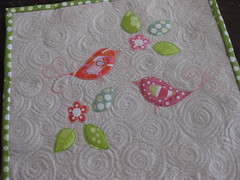
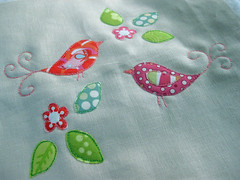
Two little birdies will be winging their way to my Modern Swap partner this week - along with some other goodies.

Hope you are all having a lovely Tuesday.

Oh, and if you haven't already seen it you absolutely MUST go and check out the most amazing craft room ever. I have serious craft room envy. Says the woman sitting at the dining table surrounded by sewing crap, with numerous toys strewn at her feet.

Thursday, August 12, 2010

My creative space

Two little birdies sitting on a wall....

Crafting is in 10 minute grabs these days - sadly! Ten minutes to draw the designs, 10 minutes to trace onto fusible and choose the fabrics, 10 minutes to iron on and cut out and iron on, 10 minutes to get sewing machine out, whizz around all the shapes, pack sewing machine away again.

Can I quilt this in 10 minutes? Ahh, no. But I'll try!!

More creative spaces as always at Kirsty's.

Monday, August 2, 2010

Long time, no blog!


Gosh, it has been a couple of weeks since I posted anything here. Since I started back at work 2 months ago sewing time has been severly depleted, and I find that despite my best intentions, I really can't sit down at the sewing machine at night after the kids have gone to bed. Firstly I'm too tired to concentrate properly and would be worried about making mistakes which I'd then just have to re-do, and secondly, there aren't that many free hours in the day to spend with Craig - it doesn't seem fair to take myself off to another room to sew. So hand-sewing at night is pretty much the only options - and to that end I have been plugging away with the Joseph's Coat petals....

And at the weekend - well that's been pretty sporadic too. My kids are aged 6, 3 and 1, and well, that obviously entails a lot of hands-on stuff! Not that I am begrudging them my time - I know that in a few short years they'll be off with their friends and won't care too much about spending time with us. So I will just fit it in where I can and try to stop feeling so envious of all my blogging and Flickr friends who produce oodles of beautiful things in the time it takes me to quilt half a pillow.... Let's just say I continue to be endlessly inspired by so many clever people. And that I look forward to the day when I have heaps of spare time to produce as much. But in the meantime - my kiddies are only going to be this little for a little while!! :-) And they are so cute. Even if they do drive me crazy occasionally.

So just a couple of Bee Blocks to share with you today - Susan asked for a wonky log-cabin/square-in-square style. A little outside my comfort zone, but actually these were such fun to make. The colours were also nothing like anything I've used before. But I love them together. The aqua and dark blue are beautiful. Next up are Lynne's Union Jack blocks which I'm intrigued about - more paper piecing!

I've also been working on something for my Modern Swap partner - but not ready to show it yet!

Thursday, July 15, 2010

My creative space...

...today involves a bunch of half square triangles (64 squares, to be exact) and a scribbly kind of 'maybe' diagram. Still not sure on whether to go with something like this, or something very simple like a zigzag. It's for a baby girl quilt.

I love the HST and have been putting together a bit of a collection of my favourite layouts. The possibilities are endless!! I'm sure someone mathematically inclined could work out exactly how endless. I'll post some of my favourites in the near future.

Not much time today as it's a work day (which means no time for sewing - acckk!!)

But if you have time, check out some more creative spaces at Kirsty's.

Tuesday, July 13, 2010

Willow - not weeping, smiling

Applique finished, quilting started - so much fun!


Monday, July 12, 2010

Ice cream social


Ice cream social
Originally uploaded by Petitselefants
I've been admiring the Oliver + S range of patterns for ages, wondering whether I had the courage to tackle one. So when I saw that Kate and Amy were hosting the Ice Cream Social - a sewalong of Oliver + S's ice cream dress, I cheered!

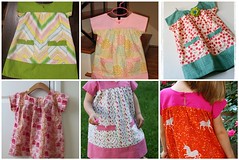
I've been poring over the pattern, and it actually does look not that hard, and to have a go-to group where everyone is trying out the same pattern will be very handy indeed! The possibilities are endless with this dress (there are three versions, a top and two styles of dress - look at these pretties that have already been posted to the group pool).

1. Oliver + S Ice Cream Dress, 2. Oliver+S Ice Cream Dress, 3. Ice Cream Social Dress, 4. ice cream top, 5. birthday ice cream dress, 6. ice cream dress

I'm hoping to do one in a Little Folks voile by Anna Maria Horner, but first I'll try it out with a cheapo fabric picked up from Lincraft some time ago (for the purposes of little girl dress-making). Just to make sure I can do it! Can't wait to get started - the pattern is traced now I just need to get cutting!

Thursday, July 8, 2010

My creative space


More free motion embroidery today - I can't get enough of this! Despite the fact that I have a cough and cold and a grumpy toddler, sewing is my little respite today.

This one is Willow - from the clever Kellie of Don't Look Now. There are around 100 of these little green leaves! Surprisingly it actually didn't take that long. Nearly done with the flowers and then it's on with the quilting (aka the scary part!) This is designed to be made up into a European-sized pillow, or a wall-hanging. Yet to decide what to do with mine.


As always, more creative spaces at Kirsty's.

Friday, July 2, 2010

A quick progress report


After yesterday's post, I whizzed away on the machine and the red tree quilt was 'finished' in almost no time at all! Well, the applique/embroidery part of it anyway. So much fun! I love doing this! This is a really forgiving technique - it's nice to give it a "sketchy" kind of look as you do two or three rows of stitching around each shape or along each line.

I actually have another couple of projects on the go too (using the same raw edge technique, so I'm economising by doing all three at once).

For those who have tried this before, you'll know that changing the thread and bobbin for each colour change can get rather tedious, so I'm trying to be clever by doing all the shapes in a colour across the three projects, then changing colours and doing it again. No doubt a huge time saver!!

Thursday, July 1, 2010

My creative space


Under my sewing machine today.... love love love this!

More creative spaces at Kirsty's.

Monday, June 21, 2010

Sunday Sewing


Hello, how was your weekend? Hubby was away for the weekend but I still managed to squeeze in some sewing! Hurrah! This is now the third Pleated Tote I've made from Ali Foster's pattern, it really comes together so quickly now. I barely even need to consult the instruction sheet anymore. The longest part is cutting out all the pieces. Or perhaps trying to decide which beautiful fabrics to use.... I finally settled on an Alexander Henry print (Birdsong) for the main part of the bag, and some Amy Butler Floating Roses for the yoke and handle. The handle looks really short from the angle of the photo, but it's not - it's the perfect size to put over your shoulder and still have access to the bag. There is a magnetic snap and a little internal pocket.

This one is for a friend's birthday. I'd so love to keep it for myself! I know she's going to love it.


I've also started putting some thought into what to make for my swap partner for Modern Swappers, and yesterday started doodling with some pretty fabric scraps courtesy of Mr Kaffe, some Moda natural muslin and some fusible, and came up with this inkling of an idea. Not sure yet where it's going to take me but I'm liking it so far.

Thursday, March 25, 2010

My creative space


Today it's all about pink! This little project will become a quilt for a four-year-old girl. I don't know what this block is called, but it's basically a 3.5 inch square surrounded by strips. I have offset the square in some blocks, and centred it in others. I think it will be 3 blocks by 4.

Now I'm thinking about putting another layer around each one, in a pink solid (in fact, I have three or four different pinks and may use some of each). If anyone is reading this and has some suggestions I would love to hear them!

And while we're at it - here's another pleated tote I whipped up yesterday for my sister.

To see lots of creative clever people, head over here.

Thursday, March 18, 2010

My creative space


The sewing frenzy continues! Funny how finishing a project instantly spurs on more action on new projects - exponentially so. By the end of the month I will probably have about 8 projects on the go - is that completely insane? Probably. I'm going beserk with my sewing machine because my return-to-work date of July is looming prominently in the foreground. Only 4 months to go, and so much to do!! I may need to start sewing in my sleep.

Anyway, today I finally delivered the 40th birthday quilt to my dear friend. As expected she loved it and was of course not the least bit perturbed that it was nearly 6 months late. I'm so pleased with how it turned out and so proud that I did everything myself. Have got plans to do another similar one. After a few other projects are complete. Ahem.

So having finished that one, I thought I would make myself something for a change and yesterday afternoon finding myself with a couple of hours to kill whipped up a fab new bag. I'm so happy with it! I can't stop looking at it!

The amazing green hummingbird fabric is from Patty Young's Flora and Fauna collection. (Sadly I've used up every skerrick I had of this and now wish I'd got some more...), the top band and handle is Wildwood by Erin McMorris, and the lining is from Sweet by Urban Chiks (it is a green backgrounded polka dot print - sadly cannot be seen because Blogger is refusing to upload any more pictures). And the pattern is by Ali Foster. A wonderful pattern - I will definitely be making some more of these bags. I will just make the handle a smidgen longer next time.

Lots and lots of clever creative people here.